Add a panel to your slide that displays a web page when the presentation is launched at runtime. This page can be static, displaying the content at a given URL, or can be dynamic, responding to user selections from slicers or visuals at runtime. A dynamic panel is enabled using a PQL expression that describes the action to take when a slice or visual element is selected. For example, the URL can be redirected to a country-specific page in response to a country name being selected from a slicer.
Tip: Web panels typically provide supporting information that accompanies the analytic information that your visuals represent with third-party, non-analytic, content from the internet. These panels may help your user to understand the analytic information on your slide or may provide some administrative or other information that is available from the internet.
Configure Web Panels
You can add web panels to your presentation that either embed a simple web page in your slide (a basic web panel that uses a URL to locate and display a page), or that include a PQL Action expression which your user can use to affect the web panel dynamically at runtime. The first step produces the basic web panel.
Step 1: Add a basic web panel
From the Toolbox:
- Click Web Page Illustration (yellow arrow).
- Click the canvas at the point where you would like to add your web panel.
- Right-click the panel and select Dynamic Url from the context menu.
- In the main text field, enter your URL within "double quotation marks."
- Click Validate (green arrow above) to test the URL.
- Once a success message opens, click Apply (yellow arrow) to save your function.

A standard-sized panel is added to the canvas.

The Dynamic URL panel opens at the bottom of the page.
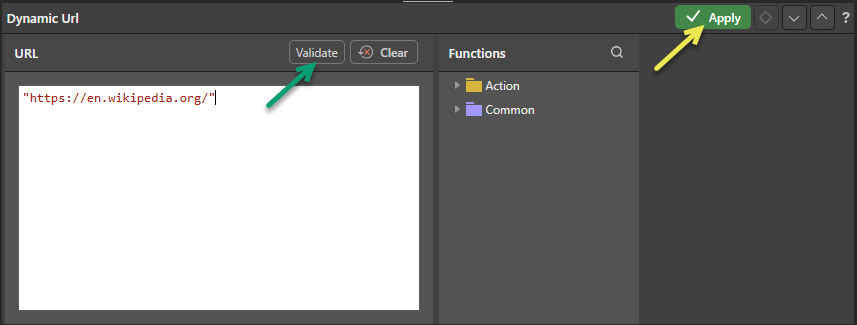
Note: Your URL needs to be contained within "double quotation marks" and needs to include the URL scheme (http or https). If you are creating a dynamic web panel, you will also add the relevant function here at a later stage.
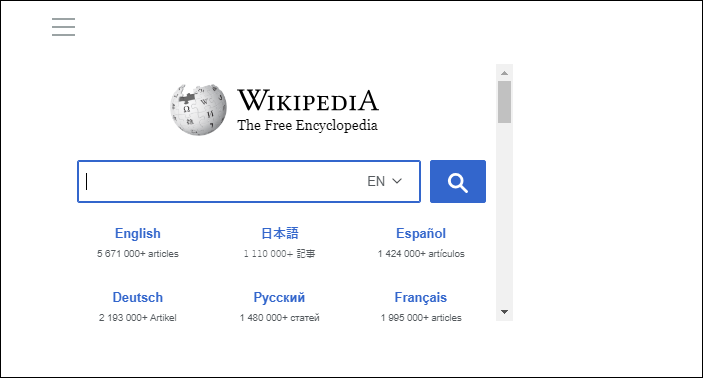
Your URL is saved. When you launch the presentation at runtime, your panel is embedded in the slide. You can check that the correct URL is displayed at runtime by clicking the Run button or F2 on your keyboard for a preview.
Step 2: Format your web panel (optional)
Once you've added a web panel to your slide, you might want to resize it, move it to a more appropriate location on the canvas, and so on. As with any other content item, you can use the standard editing options on the right-click menu and on the canvas to align and distribute web panels with other visuals or text fields, and to drag, rotate, and resize the panel.
- Click here for more information about editing items on your canvas
Step 3: Create your dynamic function
This step describes how to incorporate a PQL expression into your web panel. This function indicates what should happen when your users interact with the web panel at runtime by selecting options from a slicer or by selecting the hierarchies or member elements in a visual. Expressions are built using Common functions and functions from the PQL Action library.
Select the basic web panel that you created previously:
- Right-click the panel and select Dynamic Url from the context menu.
- Add the function that drives the interactive behavior to the URL field. This example concatenates the URL and the captions (selected member element name):
- Once you are happy with your function, Validate and Apply it and then Save your presentation.
The Dynamic Url panel opens at the bottom of the page. It contains a Dynamic URL contained by double quotation marks.
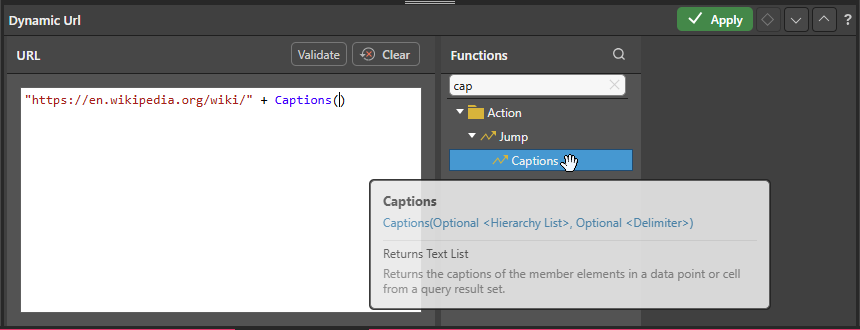
Tip: You can see a description of each available function, including syntax, by hovering your cursor over the item in the Functions tree. You can also double-click the function in the tree to copy it into the URL panel.

Step 4: Add an interaction to the web panel
Although you have defined and validated your PQL function, the interaction between the slicer or visual and the content of the web panel will not work until you have created an Interaction between the slicer or visual and the target web panel.
Note: The interaction must be added after the dynamic function is configured in the web panel (previous step).
- Click here for more information about interactions
- There are two options for creating your interaction:
- If Auto Interact (Presentation ribbon) is enabled when you add a new slicer or visual to your canvas, a new interaction is automatically created between the new slicer or visual and your existing web panel. This is the default behavior.
- Alternatively, select the Interaction Picker in the Toolbox (purple arrow), click the slicer or visual that you want to affect the web panel and drag your cursor to the web panel to create the interaction:
Tip: Click Show Interactions on the Presentation ribbon to view the interactions targeting the web panel. In the following example, the direction of the interaction arrow indicates that changes to the visual will affect the web panel.
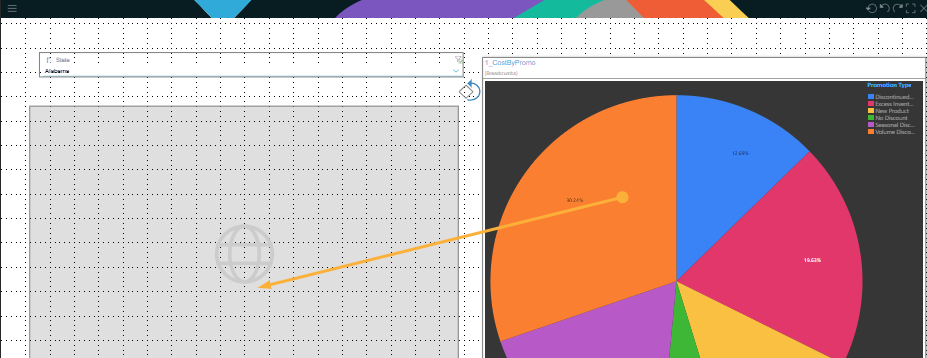
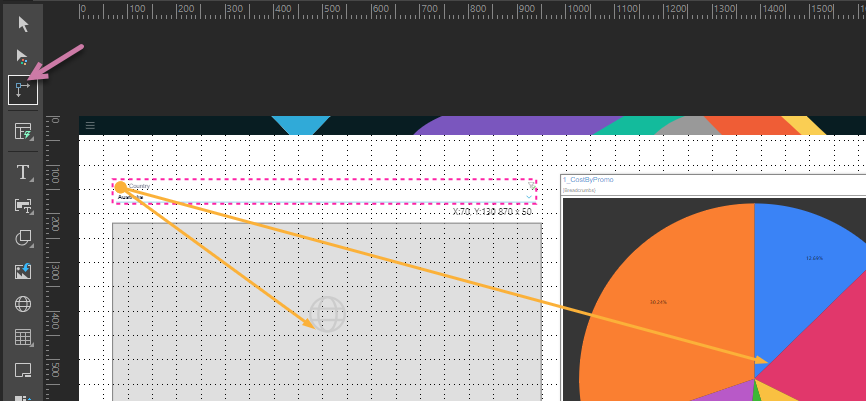
Note: In this second example, there are two interactions: (1) between the slicer and the web panel and (2) between the slicer and a visual containing a pie chart. This means that selecting a slice will affect the content of both the web panel and the visual.
- Save your presentation.
Step 5: Runtime cross-highlighting
You should always check that your changes have the effect you intended. Open the presentation at runtime, by clicking Run or F2, and update the options on your slicer or visual to check that the contents of the web panel respond as expected:
- If you created an interaction between a visual and your web panel, you can either select the hierarchies or member elements in the visual or select those same options and then right-click Interact to update the web panel with reference to your selection.
- If you created an interaction between a slicer and your web panel, you can select a different slice from your slicer to update the web panel with your selection.
- Click here to learn more about runtime interactivity
Dynamic web panel examples
With Wikipedia set as the URL, and the Captions() function appended to the string (with the optional Hierarchy List and Delimiter removed from the formula):
"https://en.wikipedia.org/wiki/" + Captions()
Add an interaction from the Country slicer to the web panel.
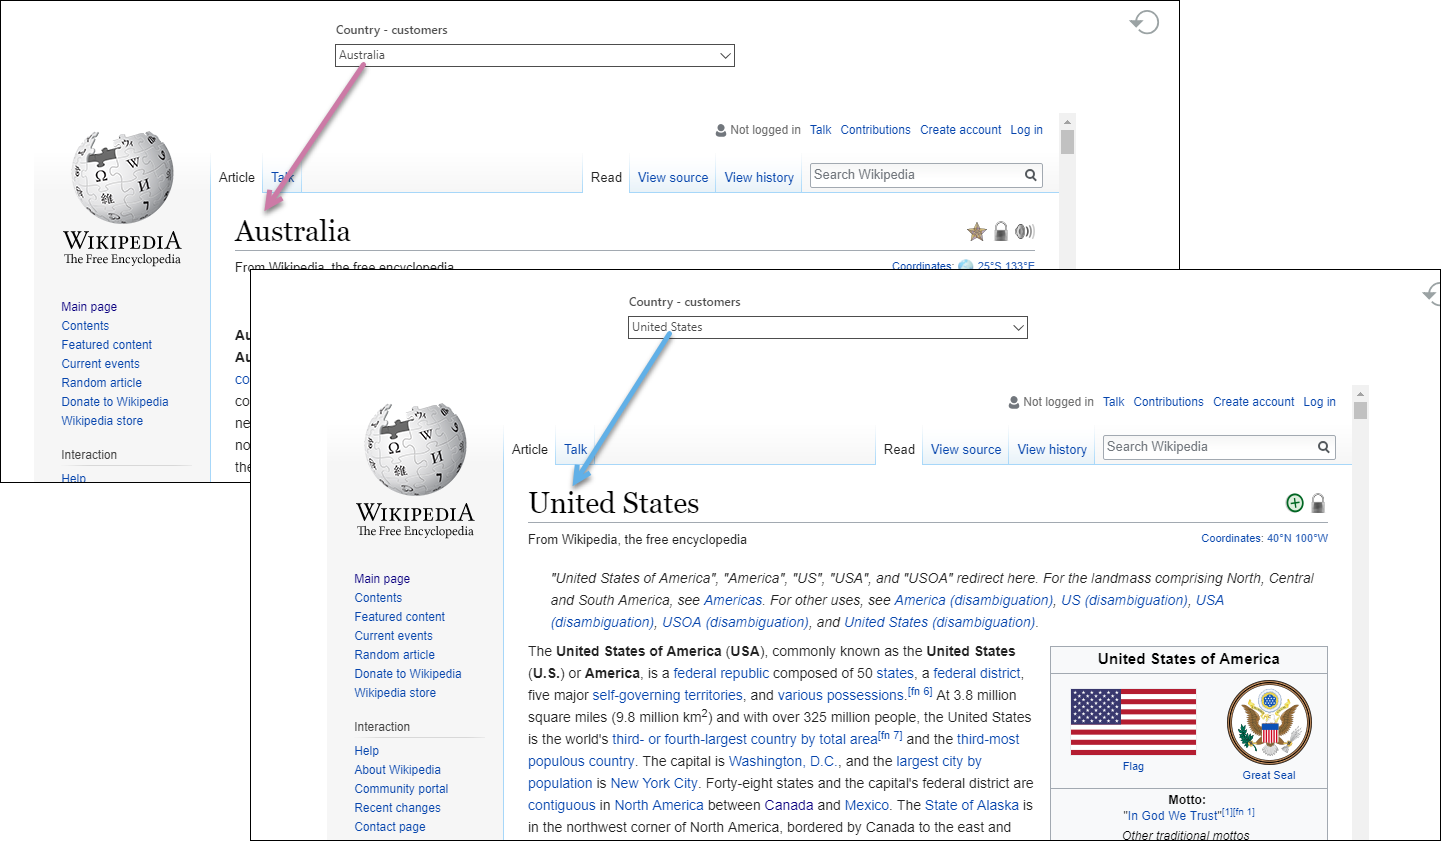
The Wikipedia page in the web panel now dynamically changes in response to the selected Country slice. In this example, the Country slicer drives the selection of the Wikipedia pages for Australia and then the United States, building the URLs:
https://en.wikipedia.org/wiki/Australia
https://en.wikipedia.org/wiki/United States
In this example, configure an If statement with the following expression:
If(Contains(Captions(), "Discount"), ("https://en.wikipedia.org/wiki/"+Captions()), "https://en.wikipedia.org/wiki/")
(The expression indicates that, if the selection includes the sub-string Discount, the first URL, the Wikipedia page with the concatenated caption, should be shown in the web panel. Otherwise, the Wikipedia home page should be shown.)
Add an interaction from the visual to the web panel.
When viewed at runtime, selecting one or more hierarchies that contain the word "Discount" opens the Wikipedia page for the selected item or items. In the following example, the blue and yellow arrows show the selected items in the visual (Discontinued Product and Volume Discount). Making these selections appends these captions to the URL in the web panel:
https://en.wikipedia.org/wiki/Discontinued Product,Volume Discount
